No need to worry about menu management with this guide
Chowbus POS provides comprehensive and flexible menu configuration capabilities for restaurants. This article will explain the menu capabilities of Chowbus and guide you on how to add categories and dishes using specific examples.
Chowbus POS menu management can be divided into the following levels: Menu - Category - Dish - Customizations - Dish Preference Settings.
After uploading the menu to Chowbus, the restaurant can create and modify categories, dishes, customizations, and dish preference settings on their Dashboard.
How to create category?
Now, let's demonstrate how to add categories and dishes using the example of a Boba tea shop adding seasonal special drinks.
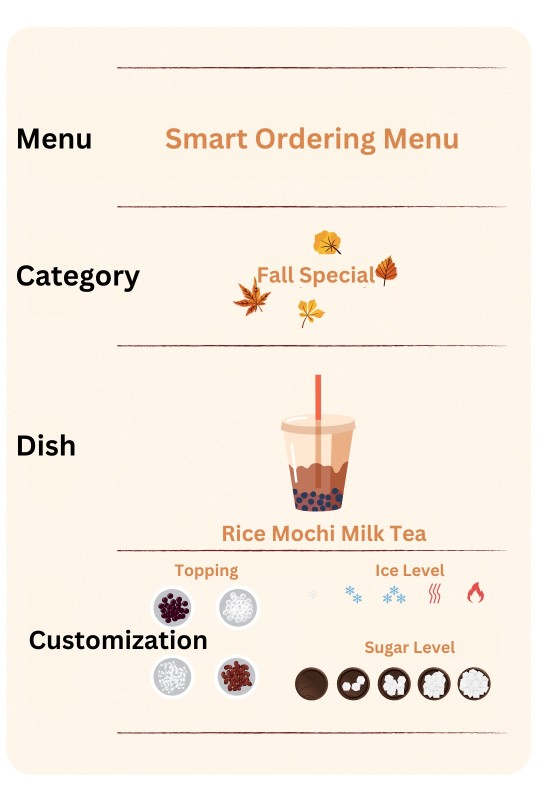
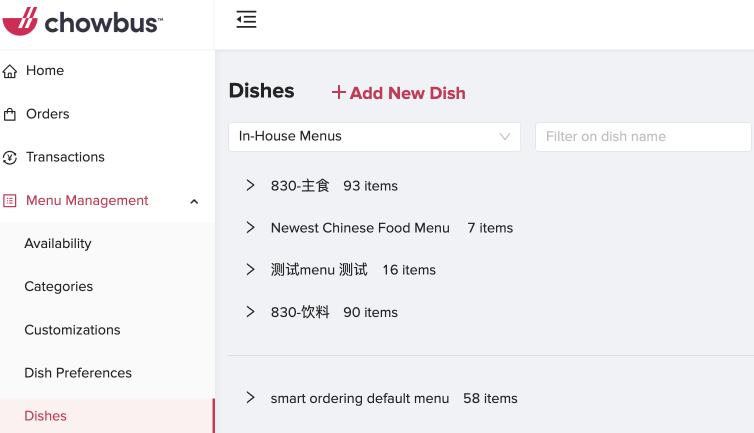
As shown in the image, the Boba tea shop wants to add a "Seasonal Special" category and introduce new items like "Rice Mochi Milk Tea" for the fall season.
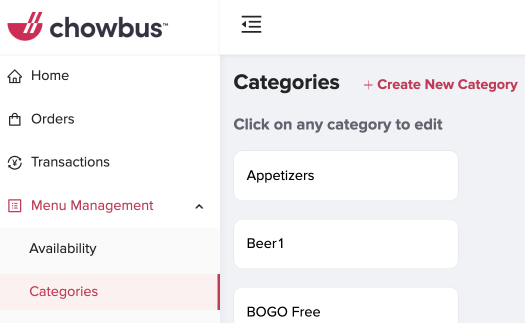
Log in to Dashboard -> "Menu Management" -> "Categories" -> "Create Category"
Fill in category information:
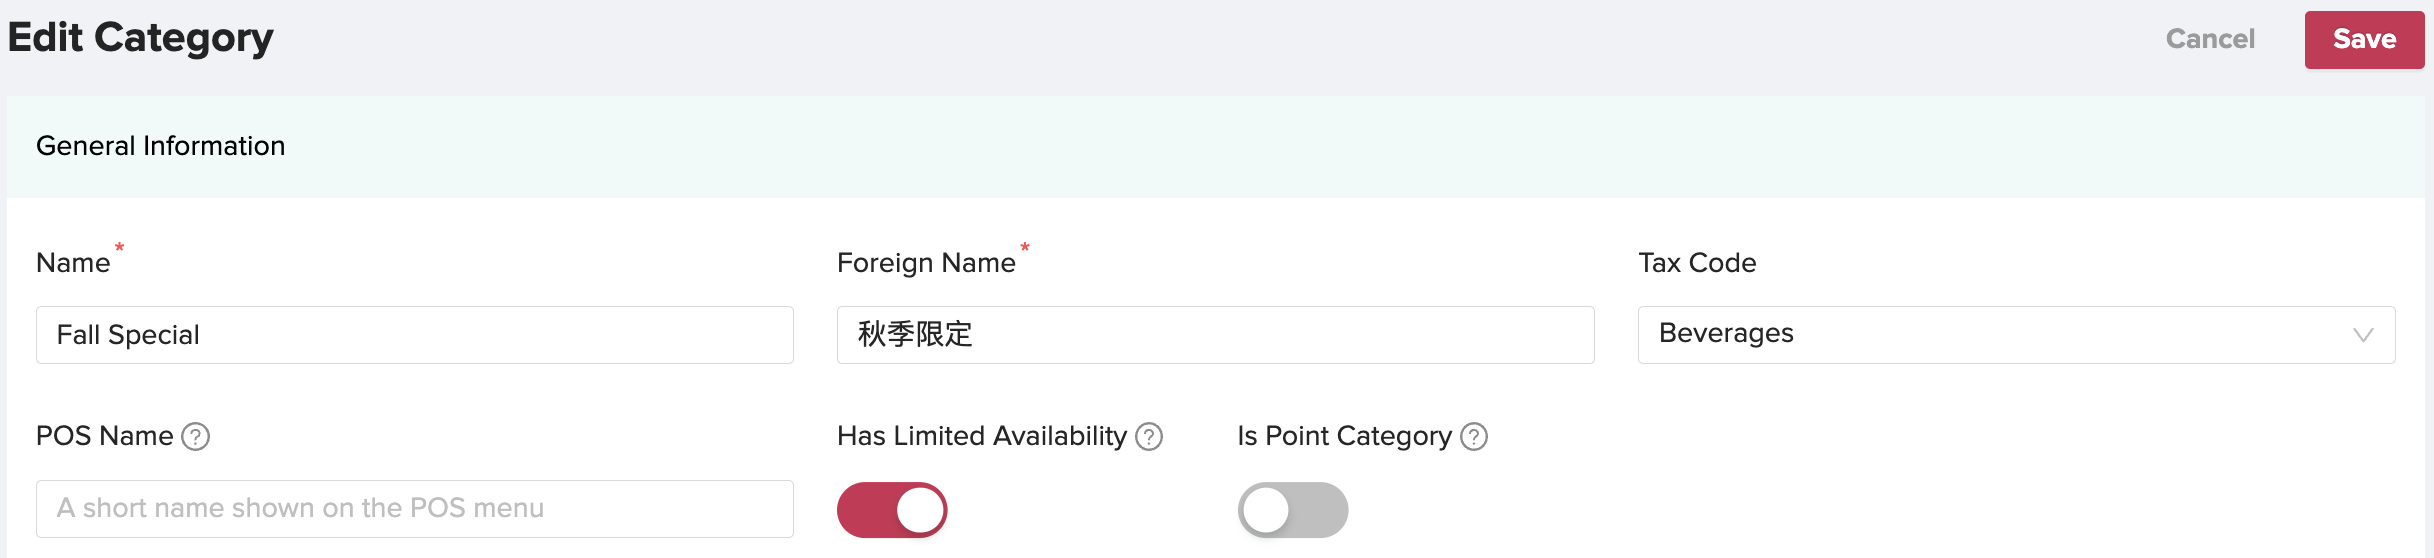
[Name]: Suggested to fill in the English name of the category.
[Foreign Name]: Fill in the Chinese name of the category.
[Tax Code]: Used to identify the tax rate of items in this category for accurate tax calculations.
[POS Name]: The name displayed on the POS App ordering interface, usually an alias or abbreviation.
[Has Limited Availability]: When this option is enabled, the category is always visible; when disabled, the category is only visible during its associated time.
[Is Point Category]: When this option is enabled, the category is a loyalty points category, and items under this category need to have loyalty points attributes set.
After filling in, click "Save" to choose this category when creating dishes.
How to create dishes?
After creating the category, you can enter "Menu Management" -> "Dishes" -> "Create Dish"
Only 4 steps are needed to create a new dish.
Dish Name and Description:
[Name]: Fill in the Name and Foreign name of the dish. If different names are needed for the POS App and kitchen printing, you can set them in [POS Name] and [Kitchen Name] respectively.
[Tax Code]: If the dish applies to different tax codes, you can set it separately for each dish.
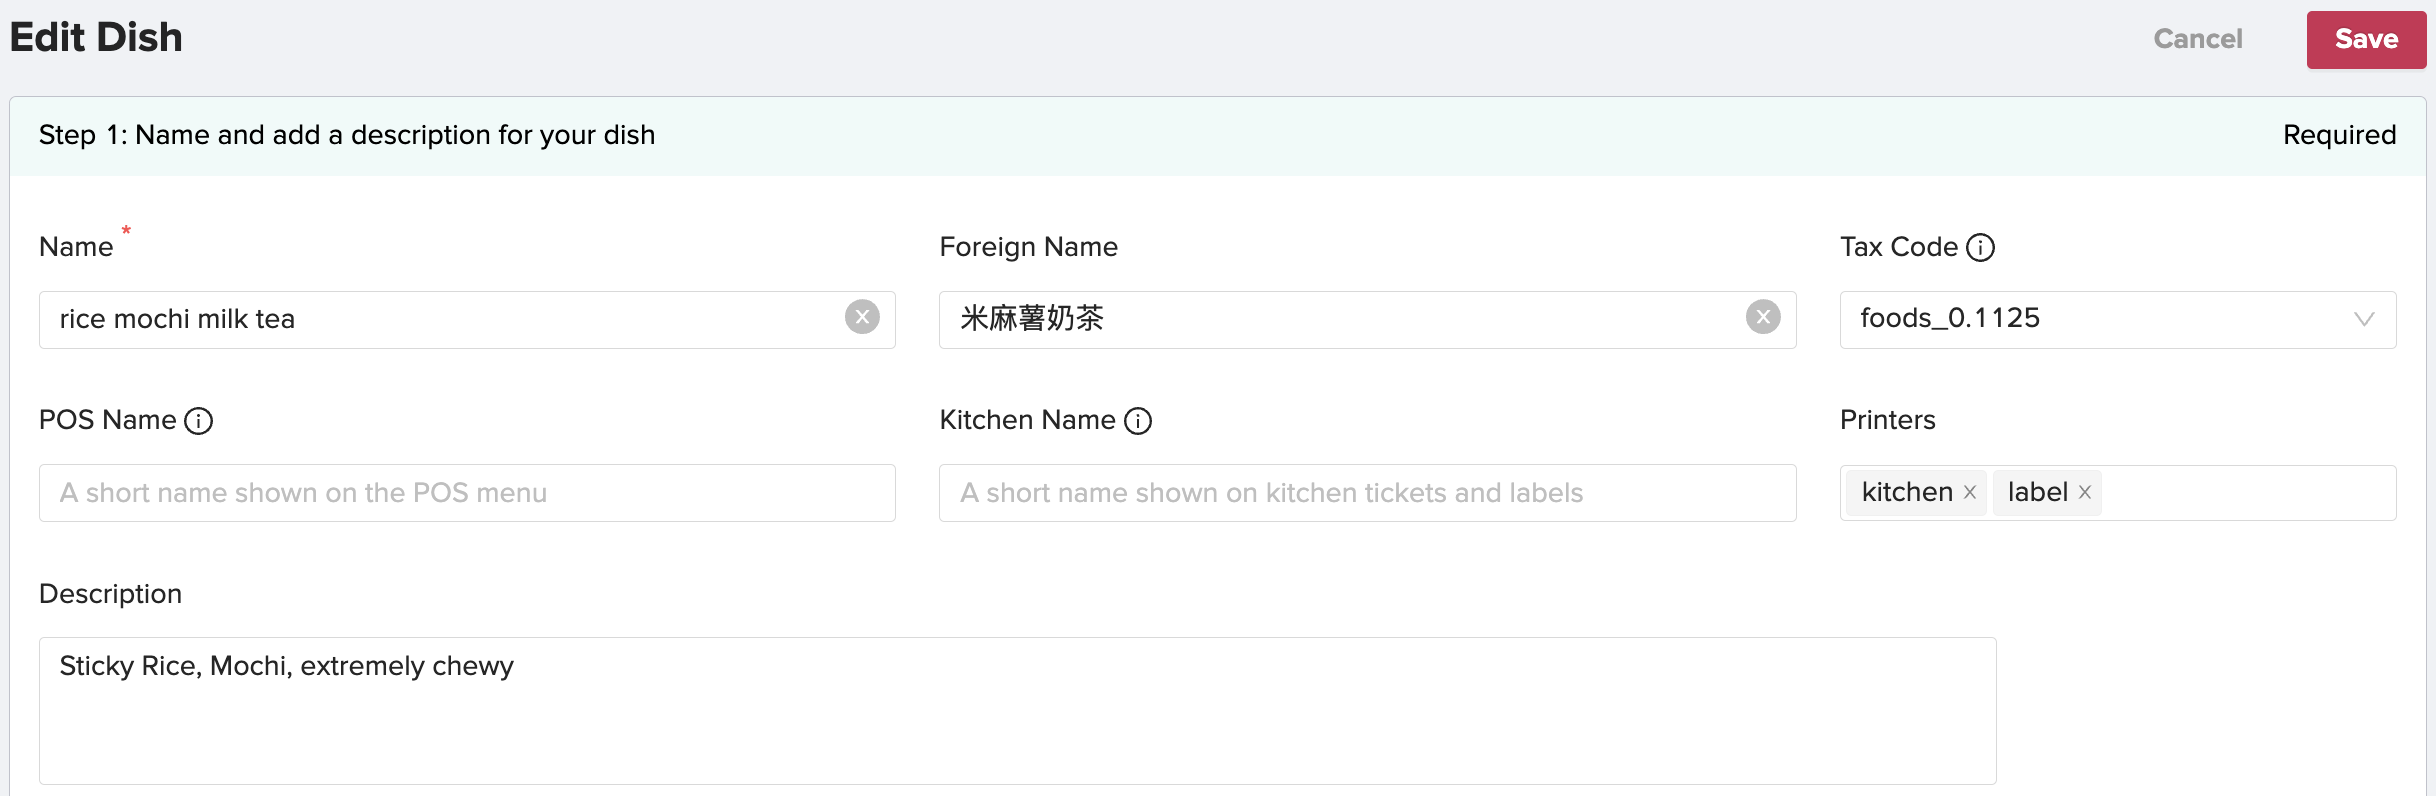
[Printers]: Select the printer where the dish is sent. If no printer is associated, the dish won't be printed when sent to the kitchen.
[Description]: Help customers better understand the dish, and it will be displayed on all menus.
Select Category:
Assign your dish to a category under each menu.

Set Prices:
Set regular and member prices. If this dish is not eligible for discount activities, you can check "Non-taxable".

Assign customizations to your dish:
Select customizations like ice level, sweetness level, toppings, etc.
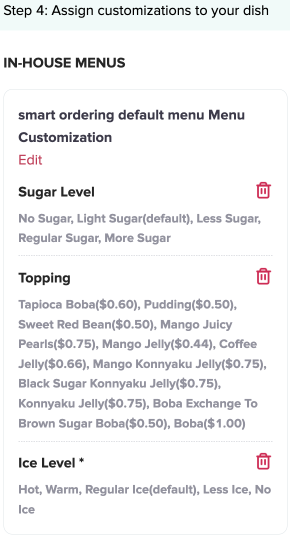
Click "Save" in the upper right corner after filling in.
This is an overview of menu management and the introduction of creating categories and dishes. If you have any questions, you can contact your account manager or provide feedback in the customer service group.
Chowbus will continuously upgrade POS products and services, ensuring restaurants operate efficiently.
To learn more about POS systems and what might be the right fit for you, book a POS demo/consultation with Chowbus! We're the #1 POS tech system for US-based restaurants!
Recommended Articles: